Today, anyone can set up first-party server-side Google Tag Manager (ssGTM) in seconds just by toggling one switch on a Cloudflare-enabled website:
Not using Cloudflare? Most of this article is applicable to any server-side Google Tag Manager setup, as it follows the same principles. You might also consider switching your DNS nameservers to Cloudflare: it's straightforward and free.
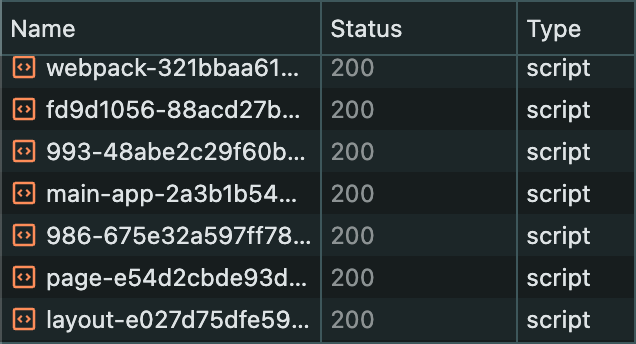
And once you grant access to your GTM container, your server-side Google Tag Manager container is live 🎉 An empty container loads two scripts:
But it's no surprise that if you visit your website with an ad blocker or from a privacy-focused browser, you will see it blocked almost immediately:
If the GTM container isn't blocked (for instance, if you use a custom loader), then all other marketing products are, configured in the container.
I recently wrote about why and how Google Tag Manager and the marketing products used in it are being blocked by ad blockers, both server-side and client-side. I demonstrated that today, more than 30% of internet users browse with some sort of blocker, and hence your analytics is losing from 20% to 50% of its data.
In this article, I will demonstrate how to unblock not only Cloudflare's server-side Google Tag Manager (or any other setup of Google Tag Manager), but also all products used by it with DataUnlocker – your frontend's guardian. The described approach ensures your analytics data remains 100% accurate and resilient against ad blockers by making it an integral part of your application.
Specifics of This Guide and Alternatives to Consider
We should clarify that this guide outlines how to create a secure proxy for server-side Google Tag Manager, installed specifically via Cloudflare, to protect our data from being blocked by ad blockers.
However, there are easier alternatives you may consider to unblock your analytics and marketing stack:
- Switch back to a client-side Google Tag Manager by copying the code snippet from Google Tag Manager and pasting it into DataUnlocker's secure enclave. DataUnlocker will effectively make your client-side Google Tag Manager server-side by utilizing its protected proxy, which is possible by setting the network protection for
www.googletagmanager.comto "Always". - DataUnlocker will soon support managed server-side Google Tag Manager via the Google tag gateway for advertisers out of the box. This means you'll be able to serve your server-side GTM container with DataUnlocker directly, with no effort. Until then, follow the setup steps outlined in this article and subscribe to our news channels for updates.
- If you're not using Cloudflare, or you have your ssGTM container installed on a subdomain, you can apply DataUnlocker to this setup already, similarly to what is described below.
How to Activate Cloudflare's Google Tag on Your Domain
Skip this step if you already have Google Tag Manager installed.
As also outlined in the Cloudflare docs and this Google guide, here are the steps to activate Cloudflare's ssGTM on your domain:
- Ensure you're using the Cloudflare proxy ("orange cloud") on the domain where you want your first-party Google tag to be served.
- In the Cloudflare dashboard, go to Tag Management -> Google Tag Gateway.
- Follow the on-screen instructions to connect your Google Tag Manager container.

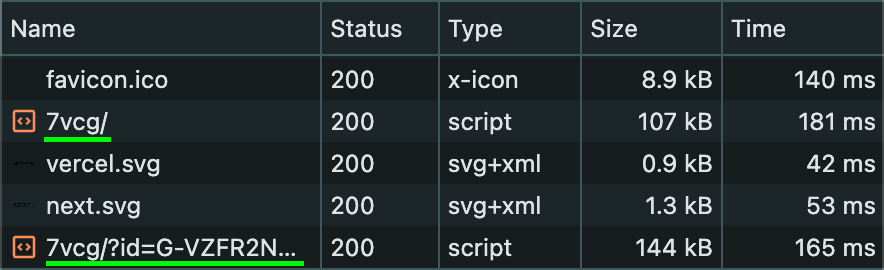
Once done, you can open the Developer Tools' Network Tab in your browser (without an ad blocker) and see new network requests loading your GTM container from the first-party URL!
How Cloudflare Injects Google Tag into Your Web Pages
Cloudflare's Google Tag Gateway automatically injects a GTM code snippet into all your HTML pages proxied through Cloudflare. Here's an example of the snippet it injects:
<!doctype html>
<html>
  <head>
    <script>
      (function (w, i, g) {
        w[g] = w[g] || [];
        if (typeof w[g].push == 'function') w[g].push(i);
      })(window, 'GTM-TP9JCNRW', 'google_tags_first_party');
    </script>
    <script>
      (function (w, d, s, l) {
        w[l] = w[l] || [];
        (function () {
          w[l].push(arguments);
        })('set', 'developer_id.dY2E1Nz', true);
        var f = d.getElementsByTagName(s)[0],
          j = d.createElement(s);
        j.async = true;
        j.src = '/7vcg/';
        f.parentNode.insertBefore(j, f);
      })(window, document, 'script', 'dataLayer');
    </script>
    ...
  </head>
  ...
</html>
Notably, the GTM code snippet is injected right after the <head> tag of your page.
Unfortunately, as of August 2025, Cloudflare gives no direct control over this injection. Unlike with Cloudflare Web Analytics, where it allows you to add a code snippet manually:
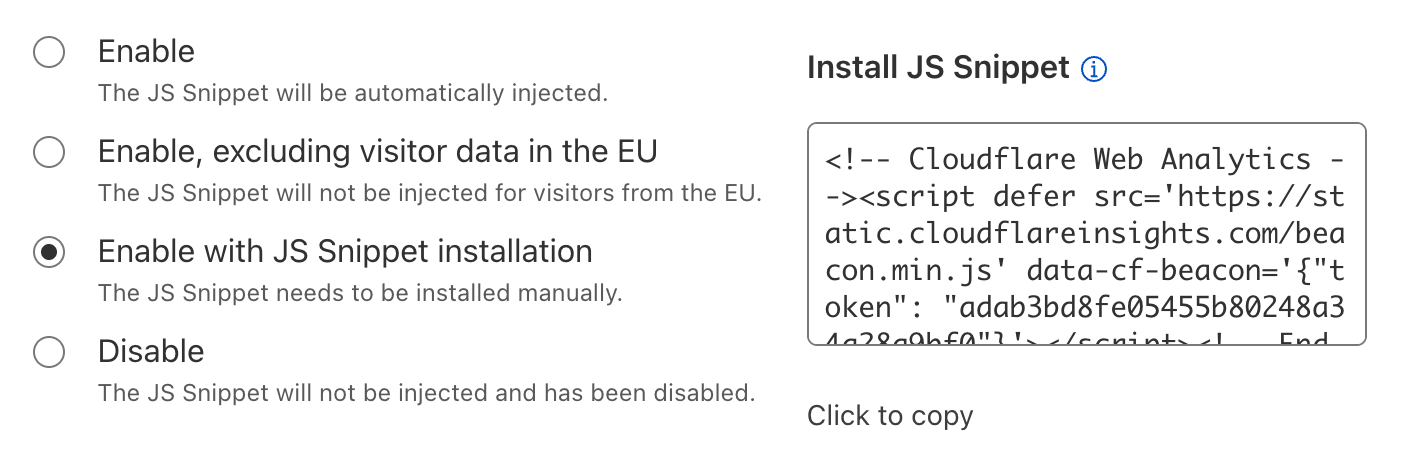
This lack of control presents a problem: ad blockers can easily target this piece of code. Even if you manage to obfuscate the initially loaded GTM URL with a custom GTM loader or by other means, ad blockers can add a simple HTML filtering rule to the website, removing this script and destroying Google Tag Manager and all your analytics pipelines and workarounds.
In the first place, we want this HTML snippet to be protected from ad blockers as well, and that's where DataUnlocker shines. To protect it with DataUnlocker, we need to stop Cloudflare from serving it while keeping Cloudflare's server-side Google Tag Manager working, and serve that code snippet with DataUnlocker instead.
Stopping Cloudflare from serving the Google Tag's code is possible, but a bit tricky.
How to Prevent Cloudflare from Inserting the Google Tag Gateway Code Snippet
Until manual ssGTM code snippet injection is implemented by Cloudflare natively, our goal is to stop Cloudflare from inserting the ssGTM snippet into the HTML code of web pages. Instead, we want to have it served by DataUnlocker and move it to DataUnlocker's Secure Enclave, to have it protected from ad blockers.
So, we need to modify the HTTP response of our pages and cut that GTM setup script out. From all the Cloudflare products running to process your request and response, we can utilize only Cloudflare Workers to achieve this task.

In theory, a Cloudflare Worker can process our HTML files and modify the response by cutting out Cloudflare's ssGTM code snippet from the HTML.
To implement this, first, ensure your DNS record is proxied on Cloudflare. This is indicated by the orange cloud icon in your DNS settings of the Cloudflare dashboard:

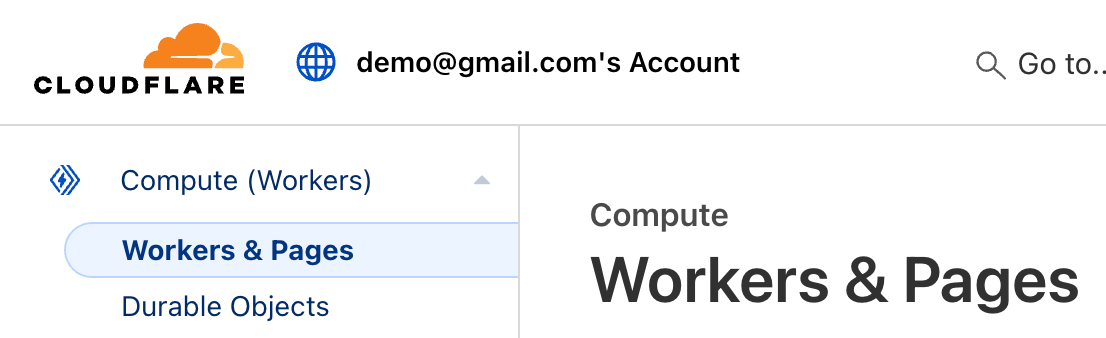
Next, create a new Cloudflare Worker. Go to "Compute (Workers)" → "Workers & Pages" → "Create".
Create the "Hello World" worker, and once it is deployed, click "Edit code" (a code icon at the top right corner). Then, replace everything with the following JavaScript code:
export default {
  async fetch(request, env, ctx) {
    // Fetch the original response from your origin or Cloudflare cache
    let response = await fetch(request);

    // Exit if it's not HTML
    const contentType = response.headers.get('content-type') || '';
    if (!contentType.startsWith('text/html')) {
      return response;
    }

    // Read the HTML as text
    let html = await response.text();

    // Add comments around the <head> tag for demonstration
    html = html.replace(
      /<head>/,
      '<!-- before head --><head><!-- after head -->'
    );

    // Return the modified response; Cloudflare will re-calculate content-length
    const newResponse = new Response(html, response);
    newResponse.headers.delete('content-length');
    return newResponse;
  },
};
To make this worker run for all pages of your site, configure a route in the Worker's settings by pressing "Add" in "Domains & Routes":
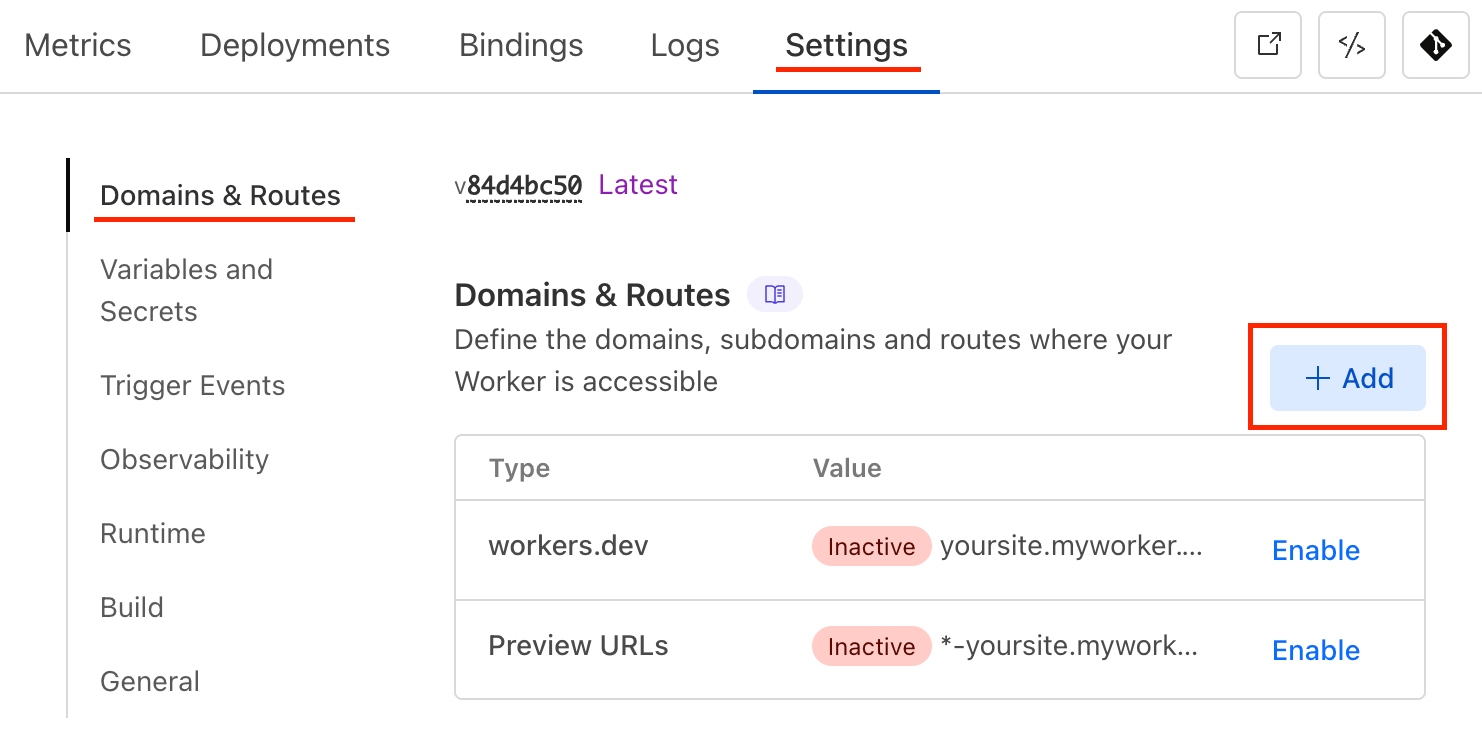
Then, select "Route" and add your website domain (ensure www is included if you have it), strictly followed by /*. You should get something like this: .
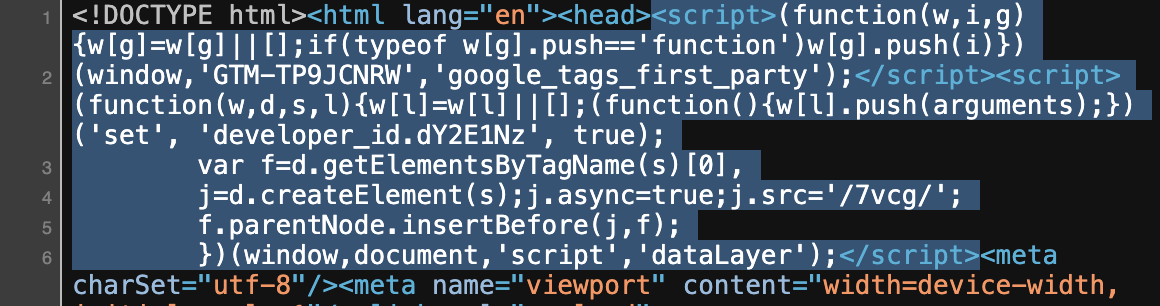
After clicking "Add Route", go and inspect your website page's source code (right-click on any of your website's web pages → "Inspect"). You'll see something like this:
<!DOCTYPE html>
<html lang="en">
  <!-- before head -->
  <head>
    <script>(function(w,i,g){w[g]=w[g]||[];if(typeof w[g].push=='function')w[g].push(i)})(window,'GTM-TP9JCNRW','google_tags_first_party');</script>
    <script>(function(w,d,s,l){w[l]=w[l]||[];(function(){w[l].push(arguments);})('set', 'developer_id.dY2E1Nz', true);var f=d.getElementsByTagName(s)[0],j=d.createElement(s);j.async=true;j.src='/7vcg/';f.parentNode.insertBefore(j,f);})(window,document,'script','dataLayer');</script>
    <!-- after head -->
    <title>...</title>
    ...
  </head>
  ...
</html>
This confirms two things:
- Cloudflare indeed inserts the Google Tag right after the
<head>opening tag. - Unfortunately, this also means Cloudflare adds this snippet after the worker processes the response.
So, we can't directly remove the snippet from within the worker, but we can wrap this code with our own. Thus, we can indeed neutralize Cloudflare's GTM code snippet!
Here's the updated Cloudflare Worker code to effectively neutralize the injected snippet:
export default {
  async fetch(request, env, ctx) {
    // Fetch the original response from your origin or Cloudflare cache
    let response = await fetch(request);

    // Only process HTML responses
    const contentType = response.headers.get('content-type') || '';
    if (!contentType.startsWith('text/html')) {
      return response;
    }

    // Read the HTML as text
    let html = await response.text();

    // Neutralize Cloudflare's GTM to later attach it via DataUnlocker's secure enclave manually
    html = html.replace(
      /<head>/,
      '<script>Element.prototype.insertBefore=Element.prototype.appendChild=()=>{};</script><head><script>delete google_tags_first_party;delete dataLayer;delete Element.prototype.insertBefore;delete Element.prototype.appendChild;</script>'
    );

    // Return the modified response
    const newResponse = new Response(html, response);
    newResponse.headers.delete('content-length');
    return newResponse;
  },
};
This Cloudflare worker removes the GTM snippet by preventing it from adding any HTML tags and cleaning up the window variables. We will later serve this code snippet with DataUnlocker.
It works by wrapping the <head> tag with "opening" and "closing" scripts in a way that:
- Prevents adding new HTML elements by replacing
insertBeforeandappendChildwith a no-op function. These functions are used in JavaScript to insert elements into the DOM, and replacing them with an empty function prevents the GTM code from attaching its script. - Deletes the redefined
insertBeforeandappendChild, as well as thedataLayerandgoogle_tags_first_partyvariables, so that the rest of the page after our closing script is not affected.
This approach should work in most cases. If you have custom attributes on your <head> tag or want to process HTML as a stream, take a look at HTMLRewriter – in our case, it is optional.
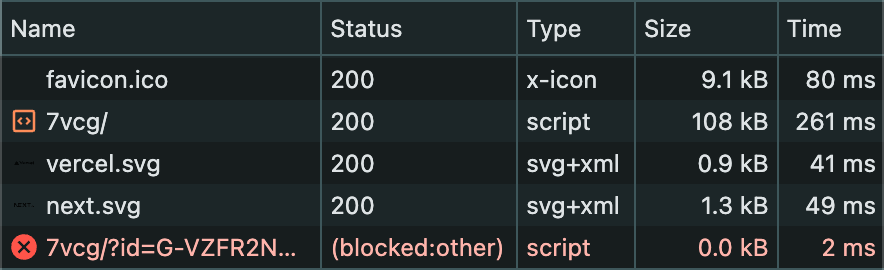
After saving and deploying this worker, if you check your network requests, you'll see that GTM is no longer loading, even though Google Tag is still enabled in your Cloudflare dashboard:
Amazing, we have just removed the ssGTM script from Cloudflare!
How to Serve Google Tag via DataUnlocker's Secure Enclave
If you haven't installed DataUnlocker on your domain already, follow our comprehensive setup guide: "DataUnlocker Overview and Setup". It's a one-time setup that will allow you to configure protection for GTM and other marketing tools.
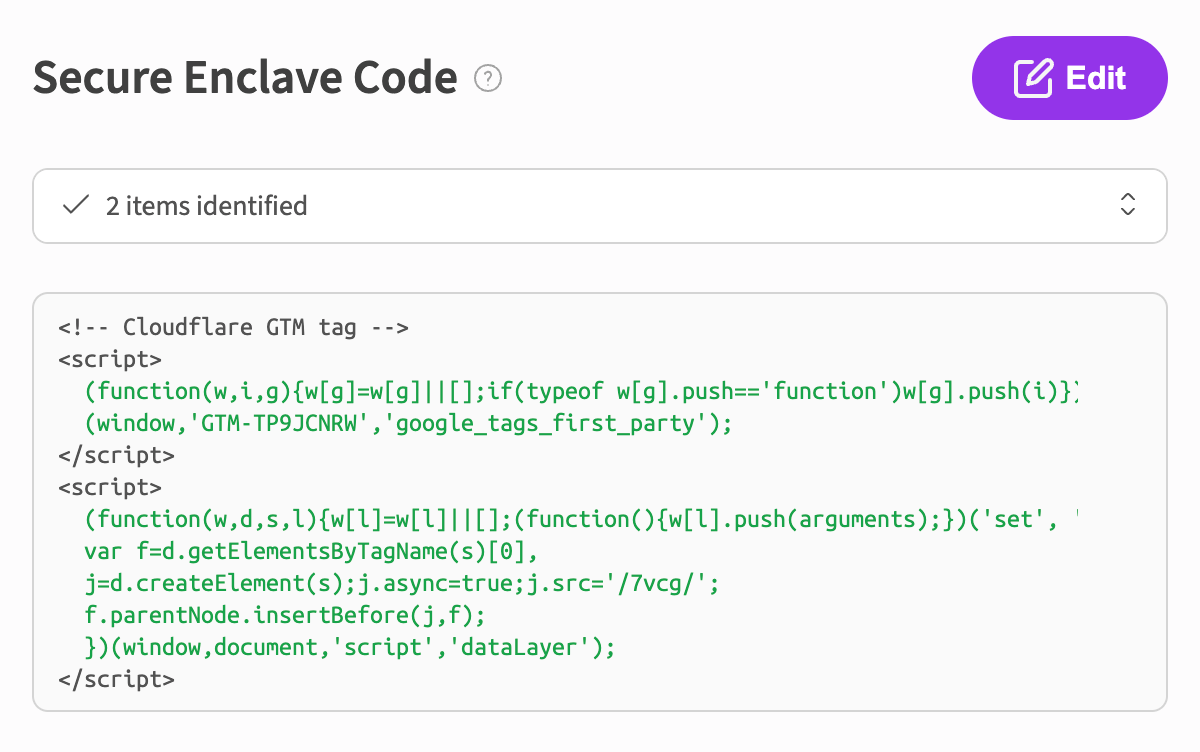
Now, we'll add the code snippet we have just "neutralized" to DataUnlocker's secure enclave. Open your web page's source code and copy the original GTM snippet (from the "How Cloudflare Injects Google Tag into Your Web Pages" section above), then paste it into DataUnlocker's Secure Enclave. Then, click "Apply".
If you check your network requests now with an ad blocker enabled, you will likely see that GTM is still blocked. However, congratulations! Your Google Tag is now served by DataUnlocker via its Secure Enclave.
DataUnlocker itself starts to load asynchronously after one of your JavaScript files with Defender integrated loads. This makes your page load faster but delays the Google Tag Manager script load by about 100 milliseconds – which is absolutely fine.
Protect First-Party Server-Side Tag Manager from Network and Ad Blockers with DataUnlocker
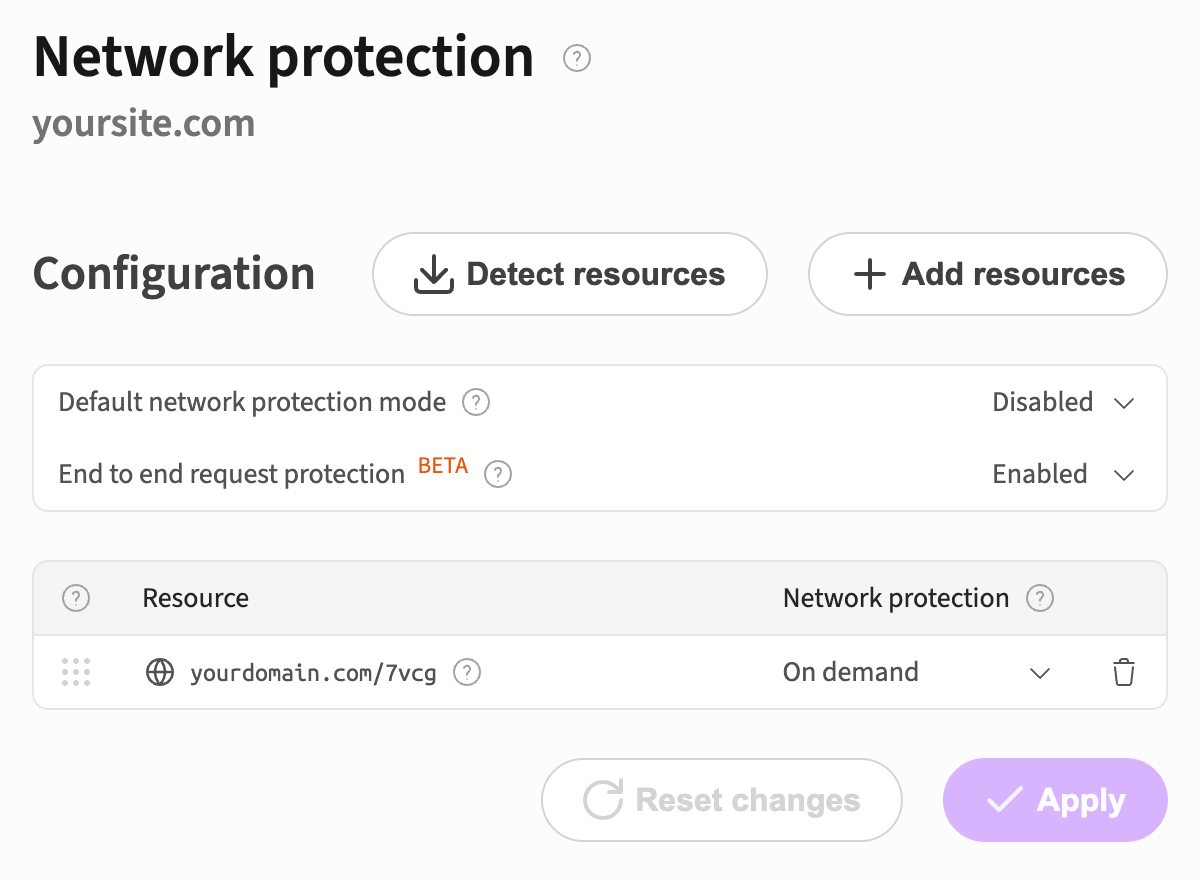
The last step is to enable network protection for our first-party Google Tag URL.
In our example, GTM is deployed on /7vcg (https://yoursite.com/7vcg).
Go to DataUnlocker's network protection settings and add a resource configuration for exactly yourdomain.com/7vcg.
Choose the Network Protection mode "On demand" and click "Apply".
You should see this:
Now, if you go back to the browser and refresh the tab, your network requests will appear encoded (obfuscated).
That's it!
Protection is enabled, and all requests going through /7vcg are now protected.
There's one blocked request, however; you may ask what it is. It's DataUnlocker's ad blocker detection: whenever you use the "On demand" Network Protection mode, DataUnlocker will test the browser for the presence of any blocker by issuing some random network requests. This is expected, and no worries: this "probe" request doesn't collect any data and just tests whether an ad blocker is enabled.
Protecting Google Analytics and Meta Pixel with DataUnlocker
Now that your Google Tag Manager is loading securely via DataUnlocker, it's time to ensure that the marketing products within your GTM container are also protected.
Step 1: Add Google Analytics and Meta Pixel to Google Tag Manager
For this demo, I'll add Google Analytics 4 (GA4) and Meta Pixel to my GTM container.
- To integrate Google Analytics 4 (GA4) with your Google Tag Manager web container, follow the official guide on how to set up GA4 in GTM.
- For Meta Pixel implementation within your Google Tag Manager web container, refer to Meta's instructions on how to install Meta Pixel using GTM. This will enable you to track website events for your Meta advertising campaigns.
Eventually, this is my GTM tags setup in my GTM container:
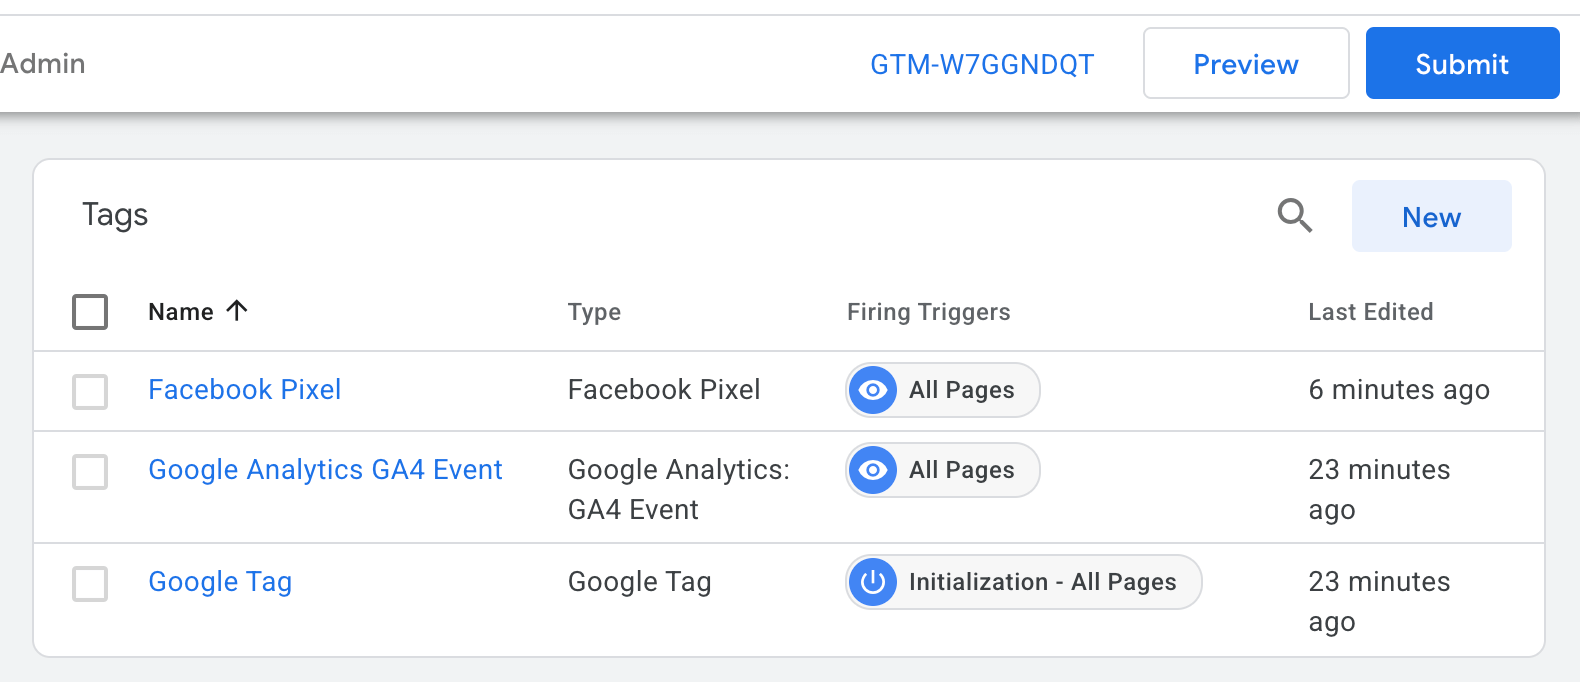
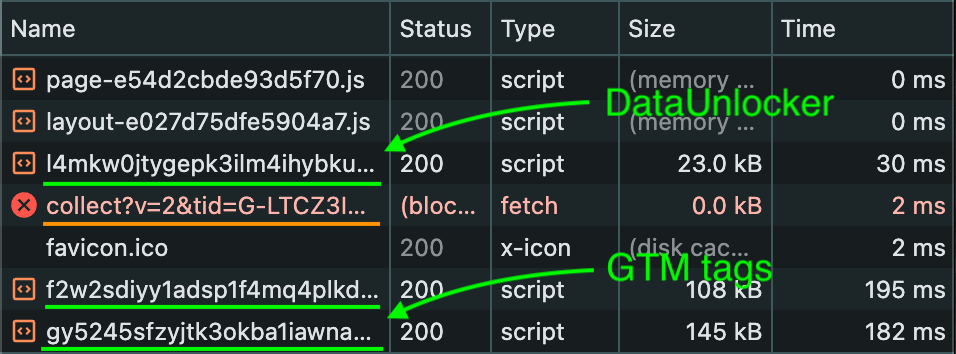
After adding these tags and publishing the GTM container, reload your website. If you have an ad blocker enabled, you'll likely see that:
- requests to Google Tag are protected (encoded)
- but the Google Analytics
/collectrequest and Meta Pixel'sfbevents.jsfail to load
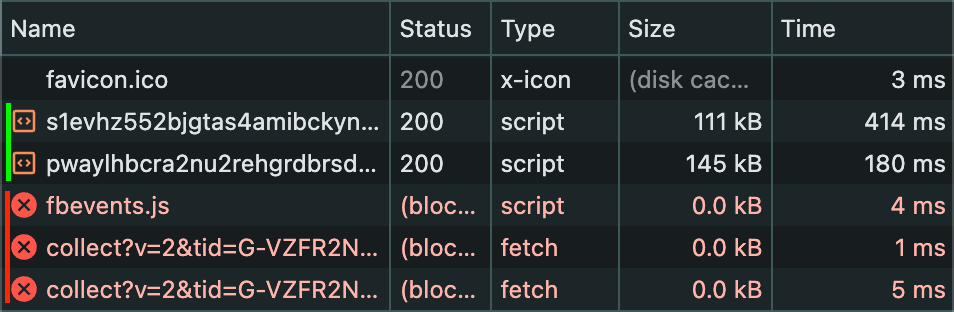
This happens because, even though GTM itself is loaded via DataUnlocker, the subsequent requests initiated by GA and Meta Pixel still contain recognizable patterns that ad blockers target:
https://connect.facebook.net/en_US/fbevents.jshttps://region1.google-analytics.com/g/collect?v=2&tid=...
Step 2: Protect GA and Meta Pixel with DataUnlocker Network Protection
To unblock these requests, we'll add them to DataUnlocker's network protection. DataUnlocker has predefined resource groups for common marketing platforms, making this process simple.
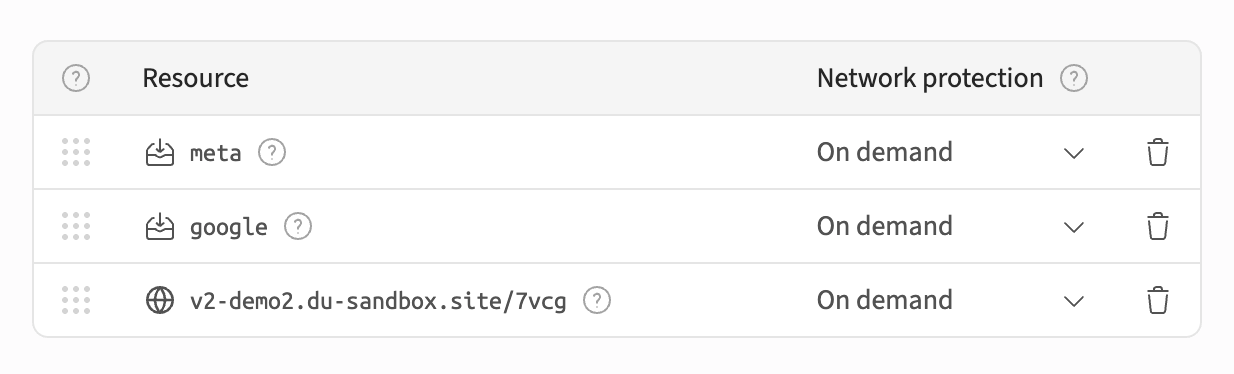
- Go to your DataUnlocker dashboard and navigate to Network Protection.
- Click "Add Resource".
- Select the
googleresource group and click "Add". - Repeat the same for the
metaresource group. - Ensure the network protection mode is set to "On demand" (or "Always" if you prefer to always proxy these resources through DataUnlocker).
- Click Apply.
Now, reload your website with the ad blocker enabled.
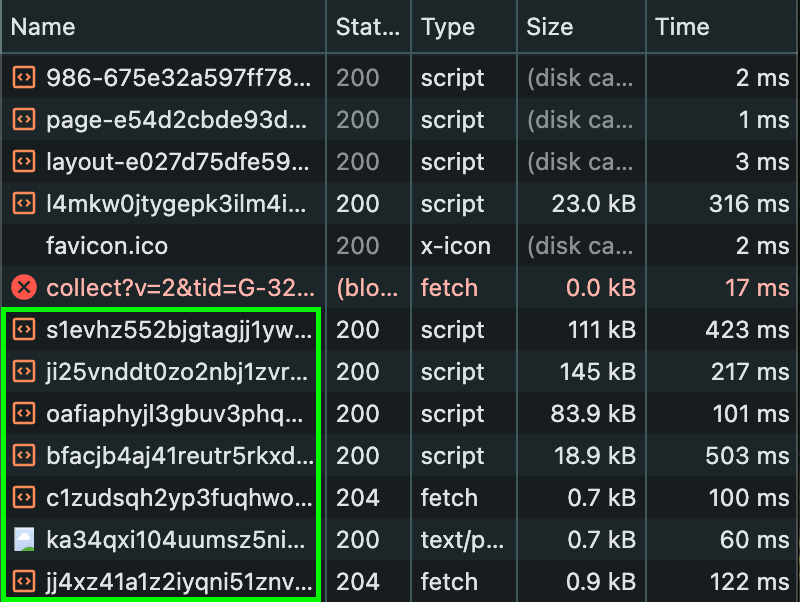
You'll observe that the requests to Google Analytics and Meta Pixel are no longer blocked. Instead, they are encoded and routed through DataUnlocker's secure network channel, appearing as legitimate first-party traffic.
Furthermore, neither of these requests can be blocked individually, as DataUnlocker features end-to-end network request protection, guaranteeing the long-term robustness of this solution, even in the face of blockers. Plus, when you use DataUnlocker's Secure Enclave, it protects your JavaScript and ensures it loads without infiltration.
Conclusion
By combining a Cloudflare Worker to neutralize the default GTM injection and DataUnlocker's robust network protection, you can effectively unblock server-side GTM and all associated marketing products, like Google Analytics and Meta Pixel, from ad blockers. This approach ensures your web analytics data is 100% accurate and resilient.
The outlined approach allows you to harness the benefits of server-side GTM while effectively bypassing the limitations imposed by ad blockers, giving you a clear and accurate view of your website's performance.