How to protect analytics data on your website with DataUnlocker
This post is the adopted transcript of DataUnlocker's ☝️ overview and tutorial video. Check it out!
You've seen the numbers: ad blockers and privacy tools prevent from 15% to 50% of your analytics data from ever reaching your analytics dashboards. Perhaps you've tried server-side tagging only to find it gets blocked too, or maybe you're ignoring the fact that data is missing, thus making critical data-driven decisions on incomplete data, missing conversions and attribution.
This guide will show you how to install, configure, and use DataUnlocker to get 100% accurate data from all your existing tools. We'll walk through the entire process, turning blocked scripts into reliable insights.
The setup literally takes 5 minutes if you know what to do, and it's free for small sites and has reasonable pricing for larger websites. You can read more in our DataUnlocker 2.0 announcement blog post.
A Quick Tour of the DataUnlocker Panel
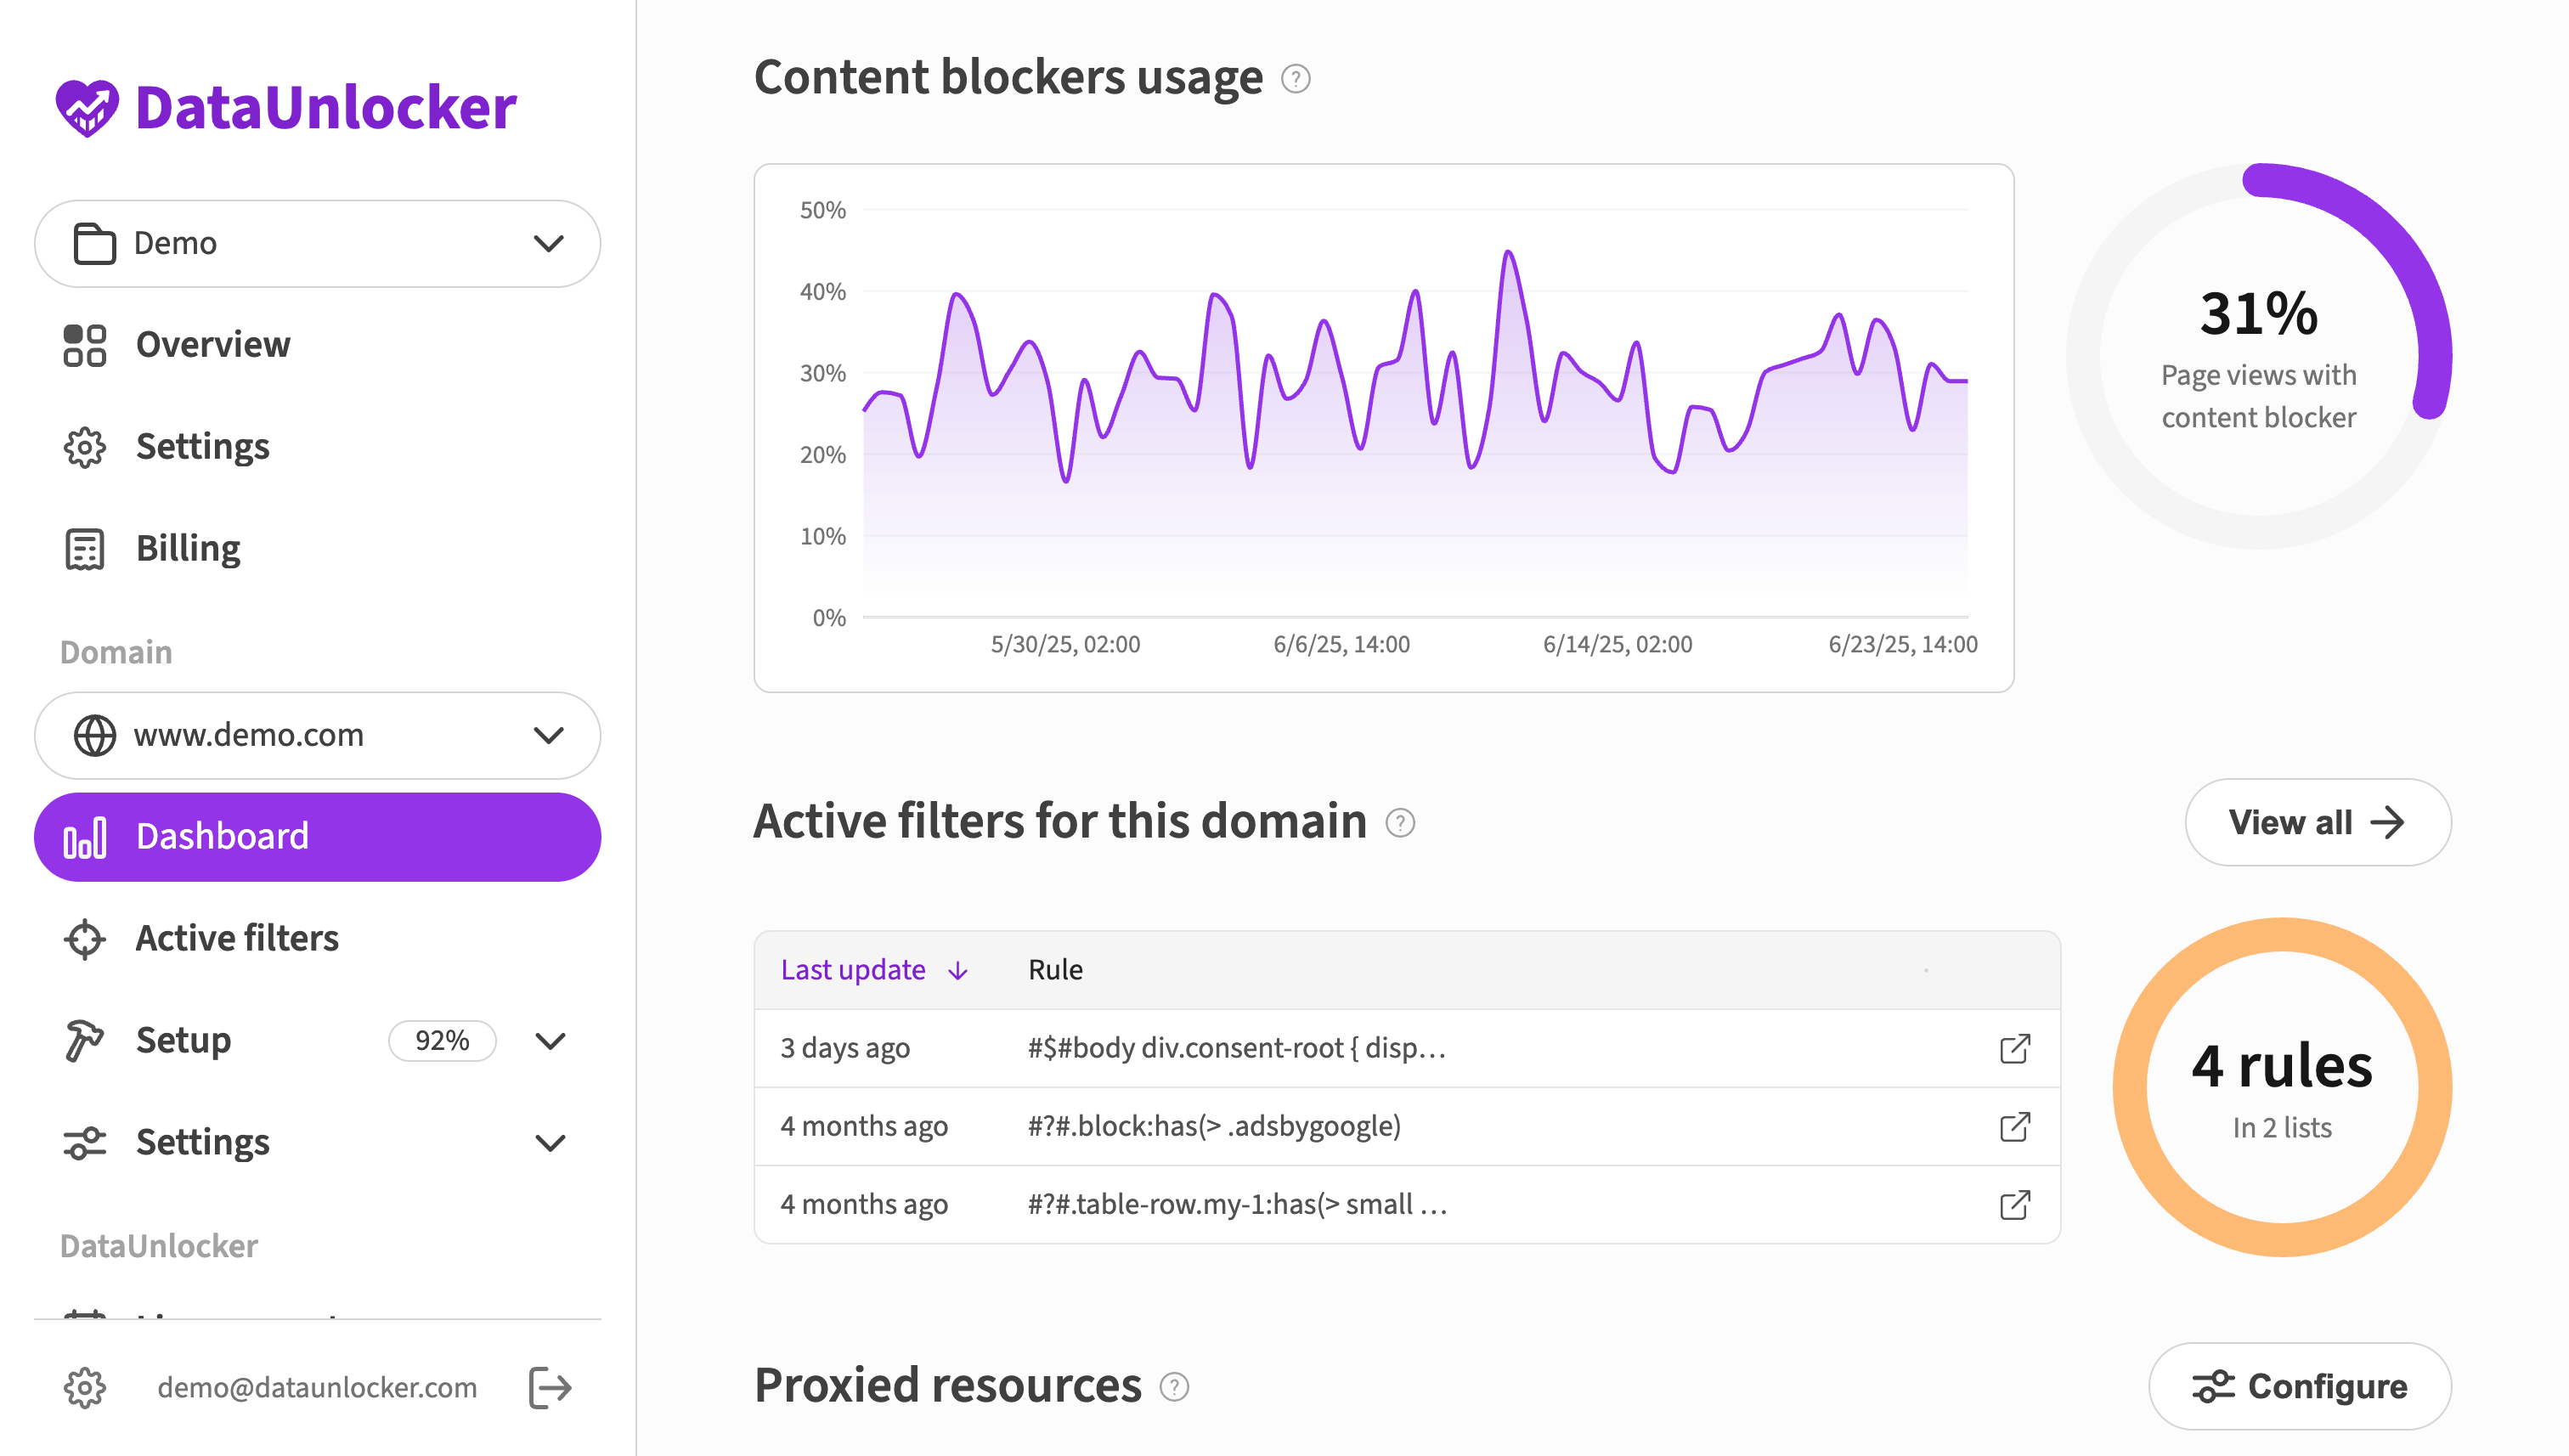
Before we dive into the installation, let's get familiar with the DataUnlocker admin panel, your command center for analytics protection.
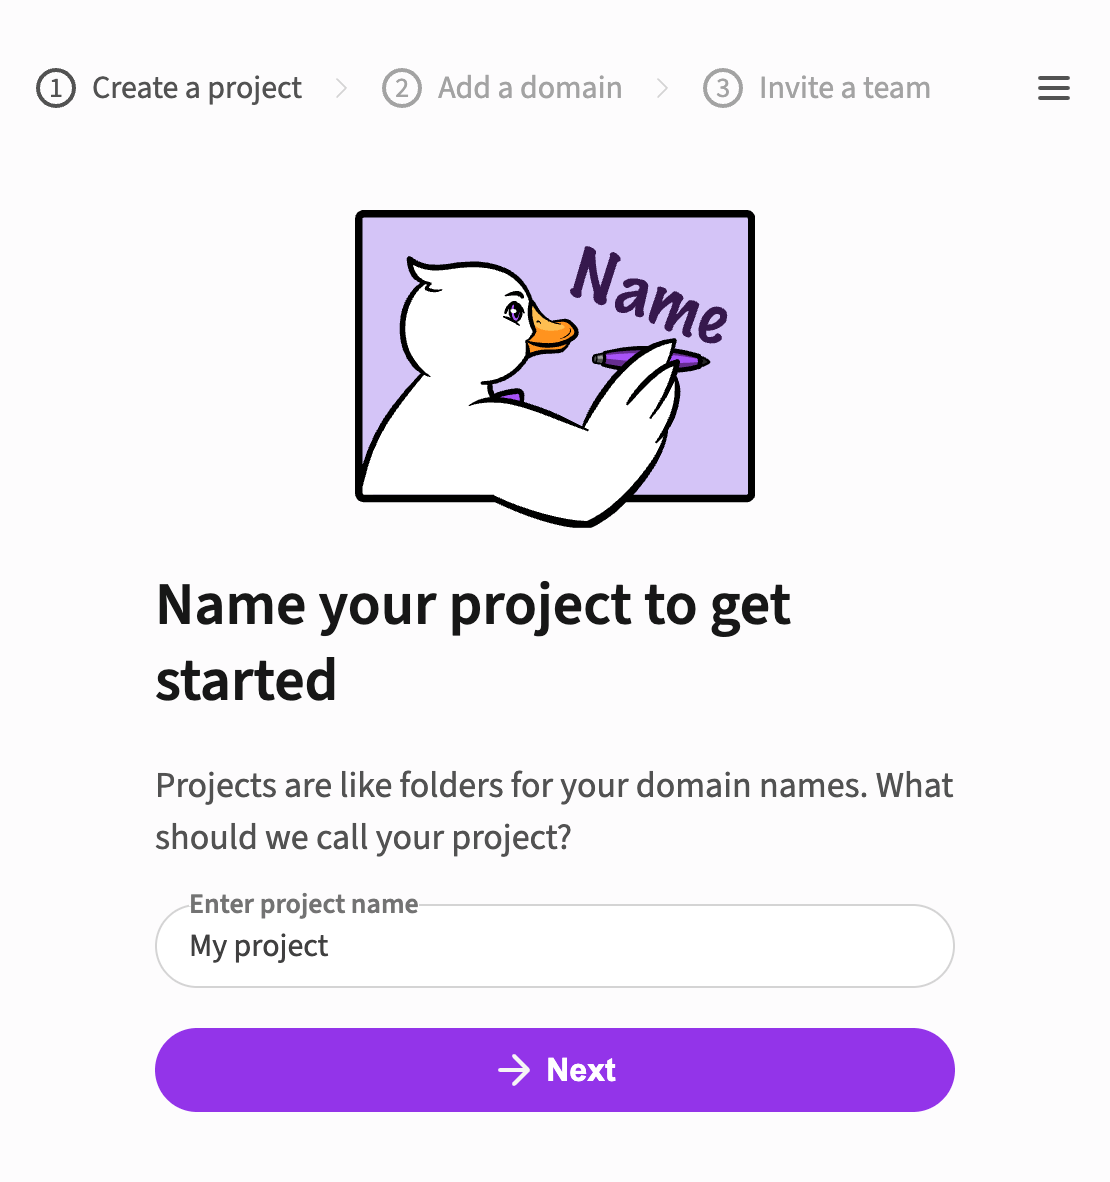
After signing up, you'll create a project which can contain multiple domains, such as for development and production environments. The main dashboard gives you an at-a-glance view of your installation status and key stats once you're set up.
Key features you'll use include:
- Health Status: each domain's dashboard shows if it's healthy or if there are issues to address. You can drill down to see details and fix any problems.
- Analytics & Monitoring: DataUnlocker reports on proxied services and will show any errors that occur. It also measures the "proxy rate", which indicates how many pageviews required protection. Our system also monitors global ad blocker filter lists and notifies you if your domain is targeted.
- Team Management: you can invite team members to your project and assign them different permission levels based on their roles.
- Billing: DataUnlocker offers a free plan and custom plans for larger needs. If your traffic spikes, you have a 3-day grace period to adjust your plan.
The Tutorial: Step-by-Step Installation
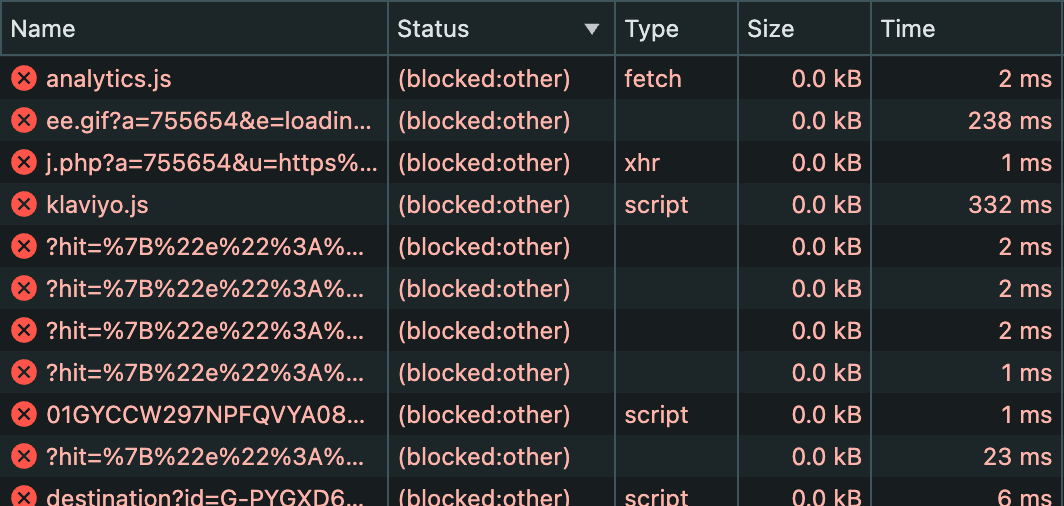
For this tutorial, we'll use a demo Next.js website that includes Google Tag Manager, Meta Pixel, and HotJar. Before DataUnlocker, a standard or aggressive ad blocker stops all three of these tools from loading.
The installation process consists of three main parts:
- Create a Transport Endpoint: a proxy to route tracking data.
- Integrate DataUnlocker Defender: the client-side component for your app.
- Move your tracking into DataUnlocker's Secure Enclave.
- Configure network protection for tracking and marketing products.
Step 1: Getting Started & Creating a Transport Endpoint
First, head to dataunlocker.com and access the admin.dataunlocker.com webmaster panel to sign up.
- Create a Project: give your project a friendly name.
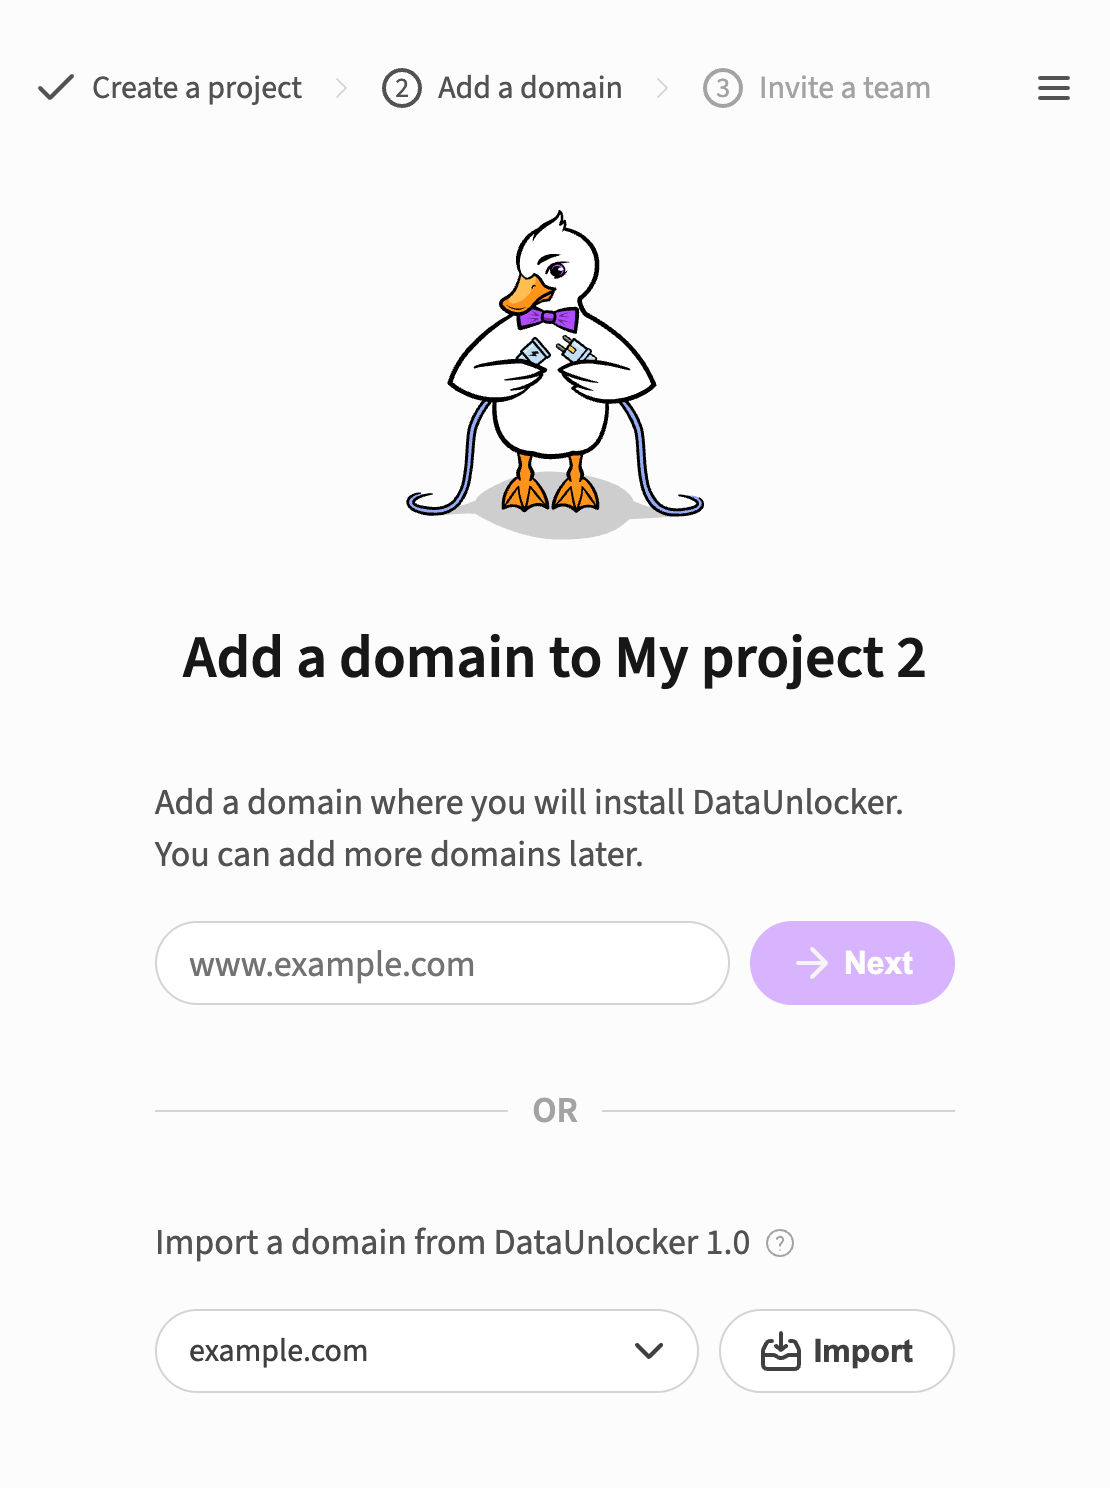
- Add Your Domain: add your development domain first. We'll add the production domain later.
Now, we'll create a "transport endpoint." This is a URL on your own domain that will proxy requests to DataUnlocker's servers and then on to the original tracking services (like Google, Meta, etc.).
There are two types: path-based (first-party) and DNS-based (third-party). We strongly recommend using a path-based endpoint, as it's more robust and avoids being treated as third-party data. The easiest and most performant setup is if your site uses Cloudflare, with the use of Cloudflare Workers.
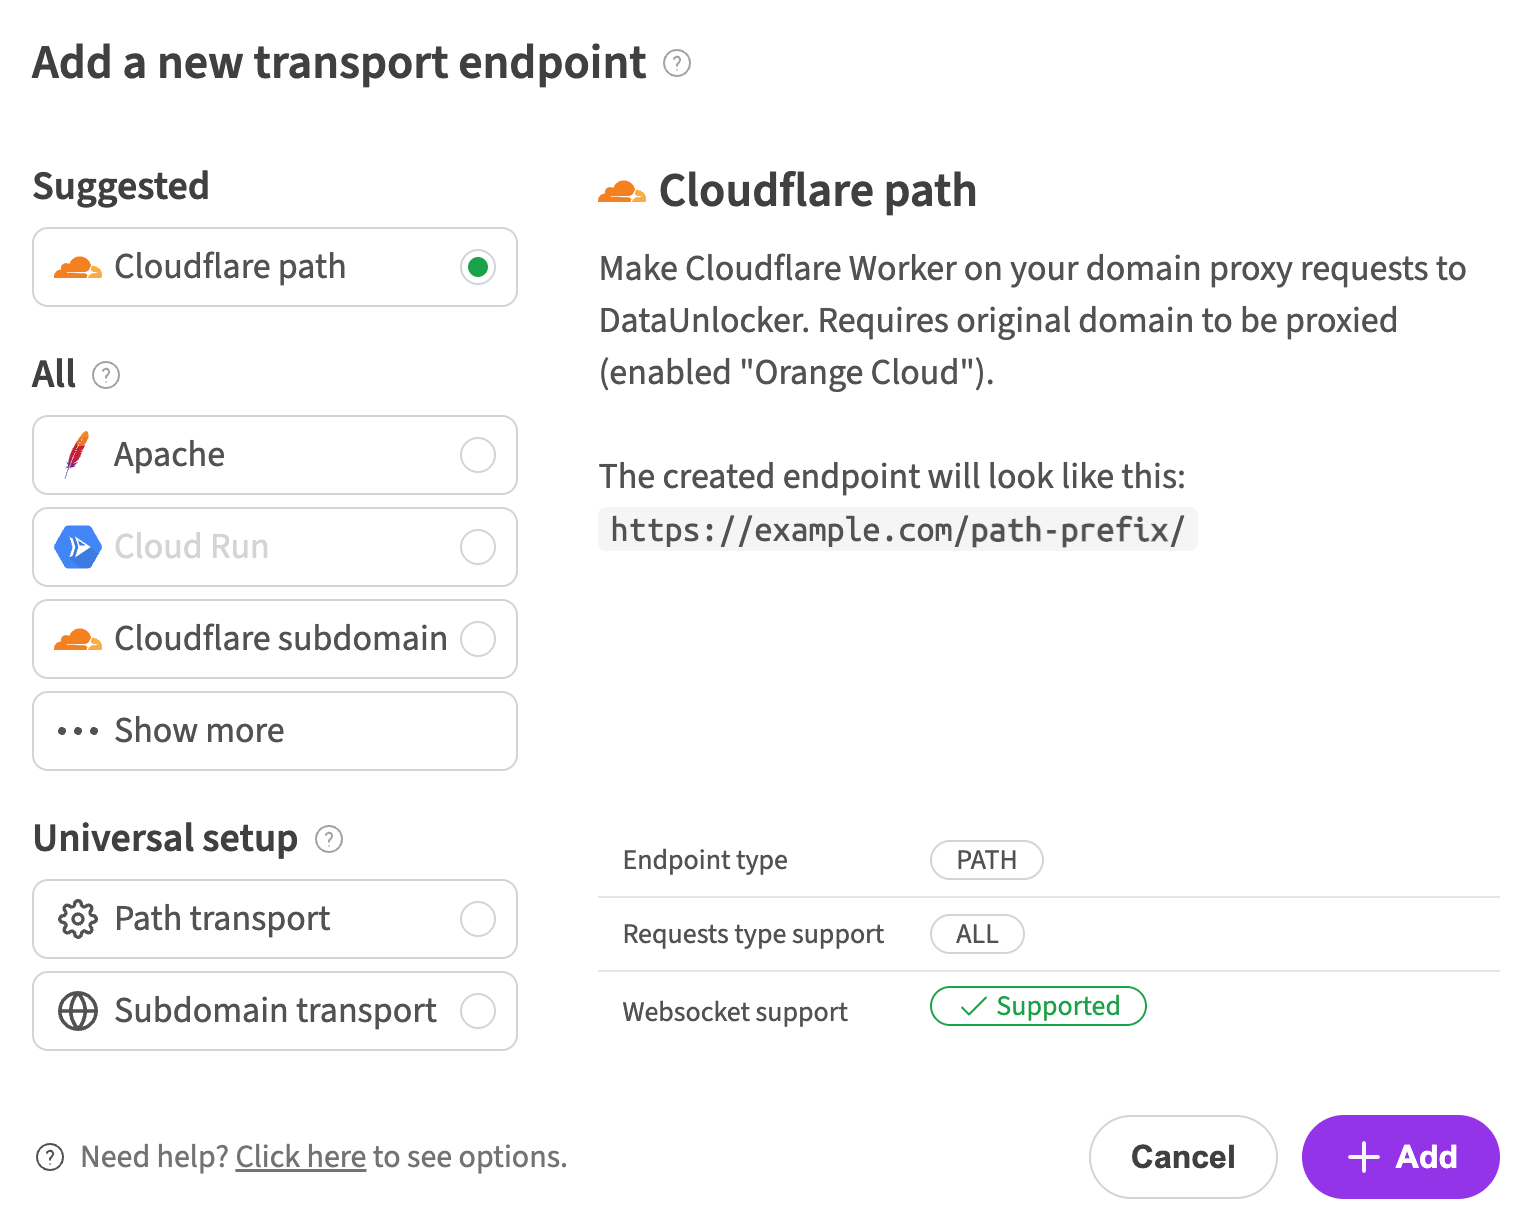
- Select Cloudflare Path Transport Endpoint: in the "Transport endpoints" section, click "Add transport endpoint" and choose this option.
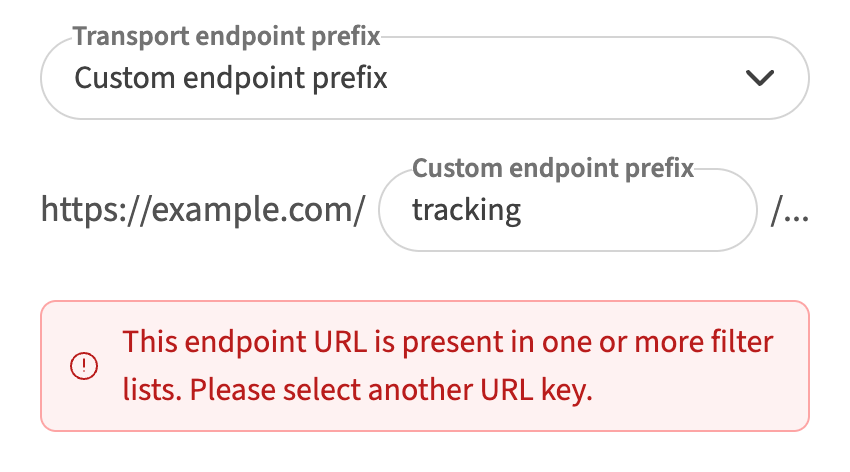
- Choose a URL Prefix: your goal is to create a "clean" URL path that isn't on any ad blocker filter lists. DataUnlocker will warn you if you pick a commonly blocked prefix like
analytics. - Create a Cloudflare Worker: DataUnlocker provides a code snippet. Simply go to your Cloudflare account, create a new Worker, paste in the code, and click "Deploy".
- Assign a Route: go to your Worker's settings in Cloudflare and add a route. This will direct traffic from your chosen URL path (e.g.,
your-domain.com/your-prefix/*) to the Worker.
Troubleshooting the Health Check
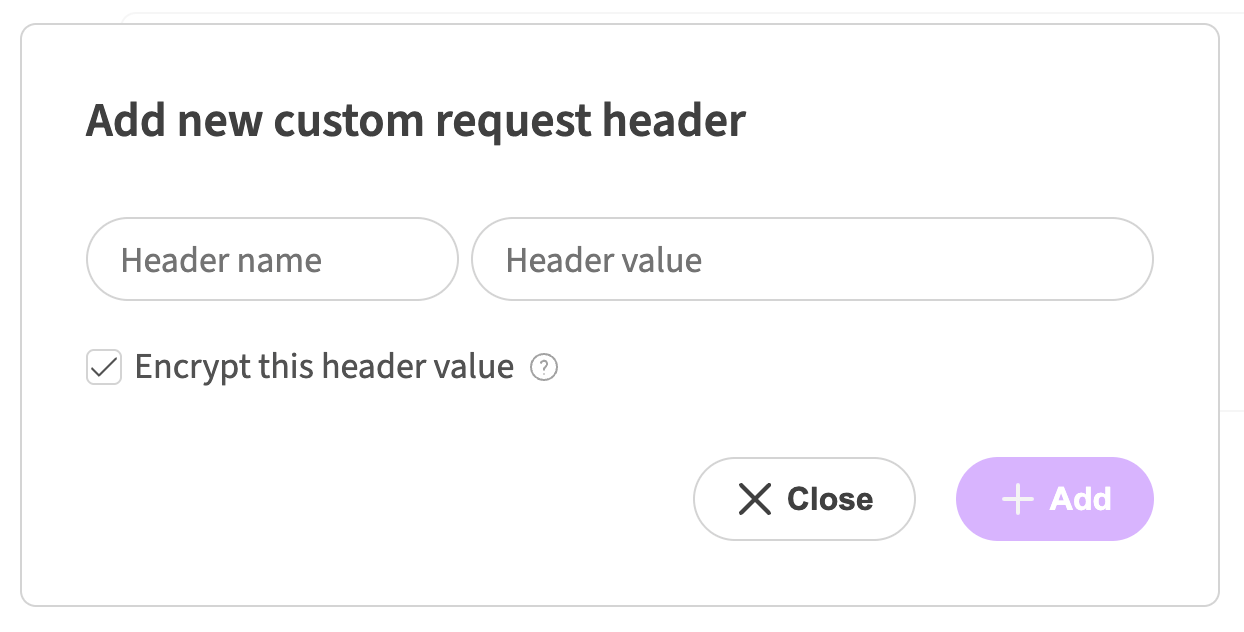
After setting up the endpoint, run the "Health check". If your development environment is password-protected (e.g., with Cloudflare Zero Trust), the health check might fail because it's blocked by the login screen.
To fix this, use the Health Check Options in your domain's settings. You can add custom request headers that DataUnlocker's check will send. Then, configure your SSO provider to bypass authorization for requests containing that header. For Cloudflare Zero Trust, this involves creating a service token and a service policy that allows access based on that token. Once done, the health check should pass.
Step 2: Installing DataUnlocker Defender
Next, we'll install Defender, the client-side integration that protects your website.
- How it Works: Defender is designed to be tightly coupled with your JavaScript application, making it difficult for blockers to separate and disable it. It loads asynchronously to ensure your page load speed and SEO are not affected.
- The
DATAUNLOCKER_ID: when you install the NPM package, you must provide aDATAUNLOCKER_IDenvironment variable. This ID is unique for each domain and is used to bundle and obfuscate the Defender script in a unique way at build time, not runtime. - Managing Environments: since the ID is domain-specific, you'll have a different one for your development and production sites. A good practice is to add your development ID to an
.dataunlocker.jsonfile for local work, which acts as a default. You can then override this variable in your production deployment environment.
- Get Your ID: find the
DATAUNLOCKER_IDin your domain's settings in the DataUnlocker panel. - Install the Package: set the environment variable and install the package. For a React/Next.js app, this would be @dataunlocker/defender-react.
- Integrate the Component: import the
<Defender>component and wrap your root layout with it. This injects Defender's protection into your application.
Step 3: Configuring Your Tracking Tools
With Defender installed, you'll notice a network request to your transport endpoint, which is a good sign. However, your tracking scripts like GTM are still being blocked. This is because they are loaded before Defender has a chance to initialize.
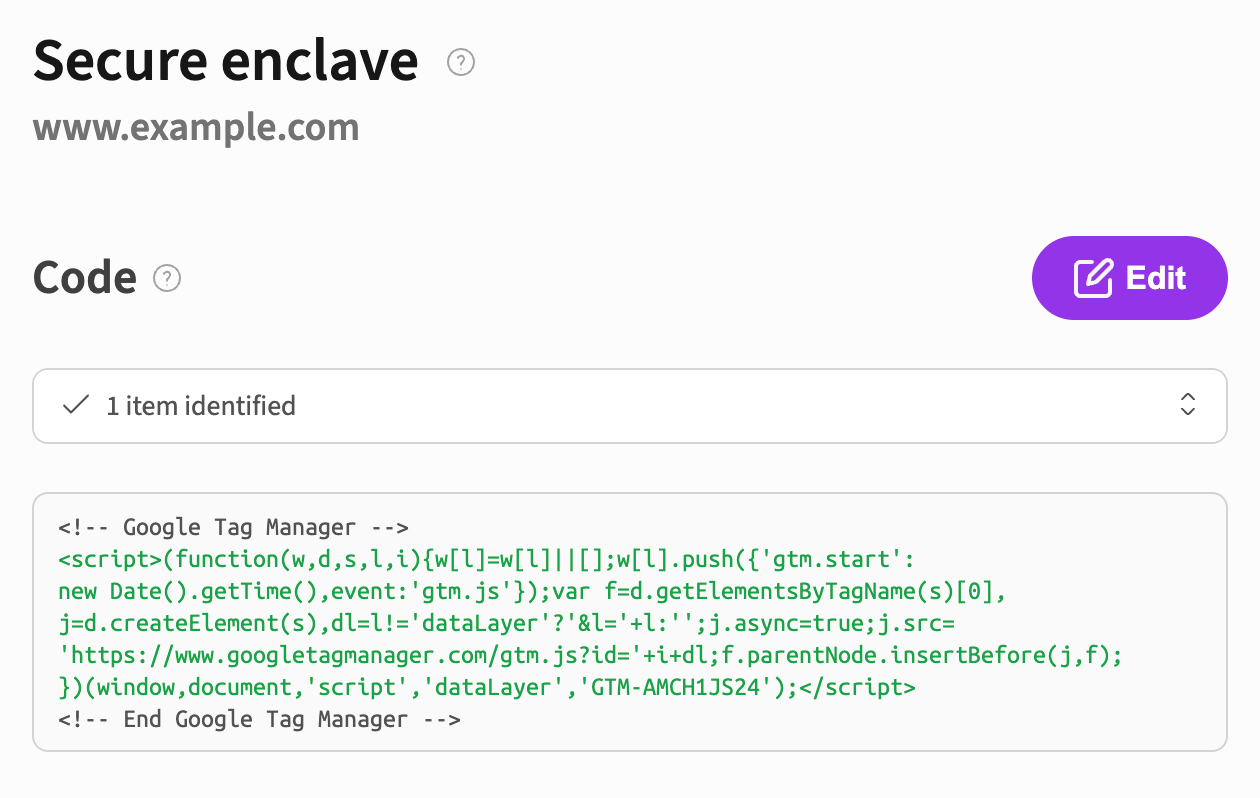
- Use the Secure Enclave: The recommended solution is to move your tracking code into DataUnlocker's Secure Enclave. This is a feature in the DataUnlocker UI designed specifically to host and serve your tracking snippets securely. Cut the Google Tag Manager script (and any others) from your application's HTML (or JavaScript) and paste it into the Secure Enclave editor in the panel.
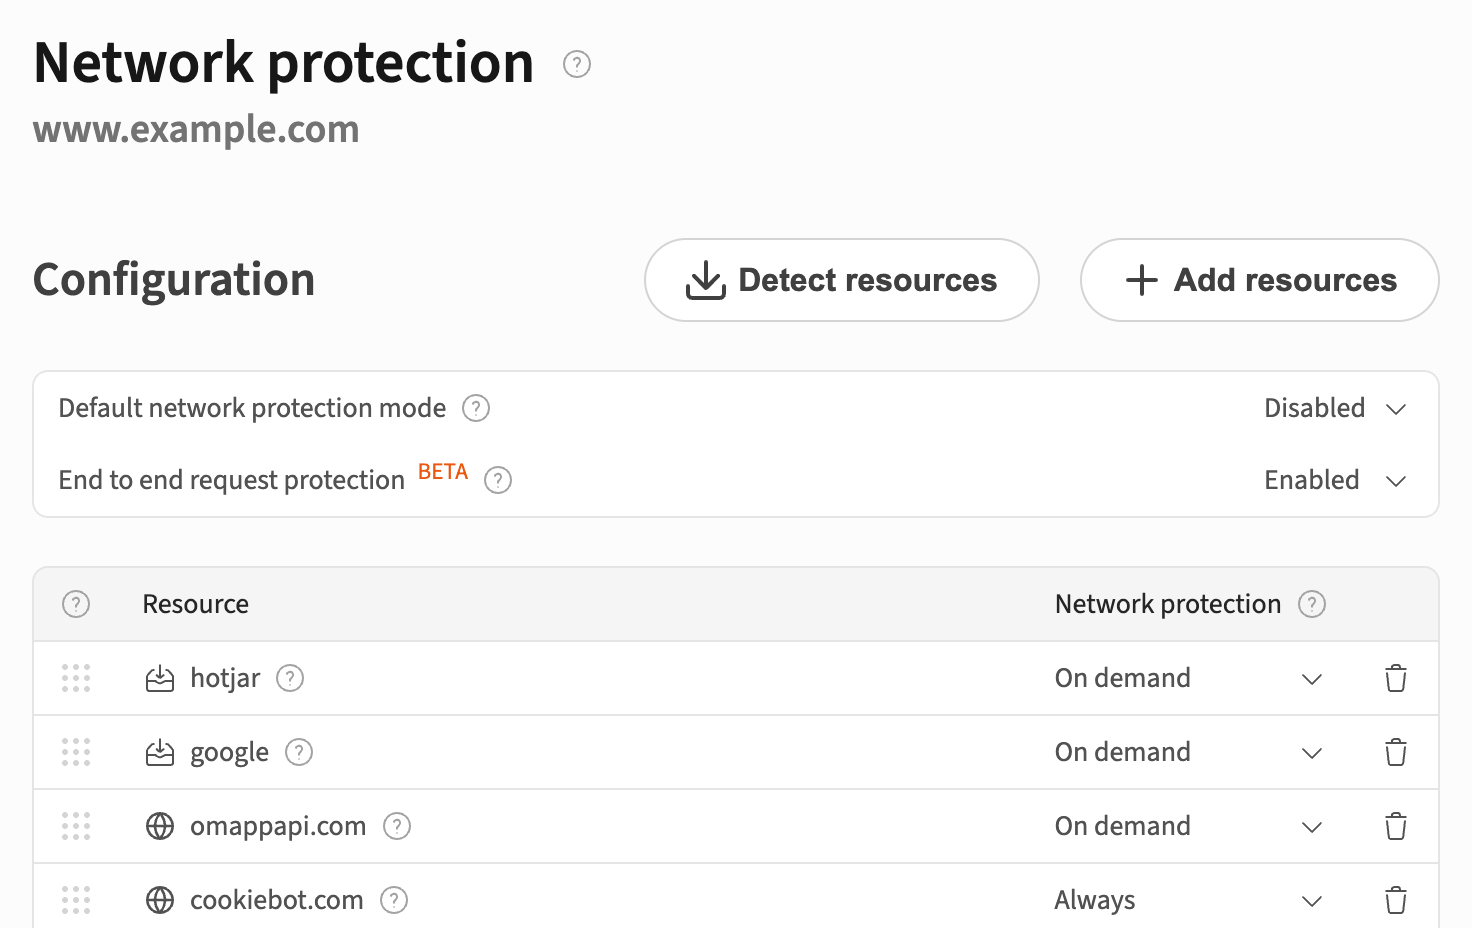
- Configure Network Protection: this is the final step where you tell DataUnlocker which domains and paths to protect.
- Click the "Detect Resources" button. DataUnlocker will scan your site and automatically identify the domains for your tracking tools (e.g.,
google-analytics.com,connect.facebook.net, etc.). - Choose a protection mode for each resource: "On demand" or "Always". "On demand" activates the proxy only when a blocker is detected, which is cost-effective and delivers around 99% of events. For 100% accuracy or for initial testing, choose "Always".
- Click the "Detect Resources" button. DataUnlocker will scan your site and automatically identify the domains for your tracking tools (e.g.,
Step 4: Production Deployment and Final Testing
Now that the development setup is working, repeat the process for your production environment:
- Add your production domain in the DataUnlocker panel.
- Create a new transport endpoint for the production domain.
- Copy the new production
DATAUNLOCKER_IDand configure it as an environment variable in your production deployment settings (e.g., in Cloudflare Pages or Vercel). - Ensure the Network Protection configuration for the production domain mirrors your development setup.
- Deploy your application to production.
Verification: Does It Actually Work?
It's time to see the results. Open your production site in a browser with an ad blocker enabled.
- Network Tab: you'll see that requests to services like Google Analytics are no longer blocked. Instead, their URLs are encoded and proxied through your transport endpoint.
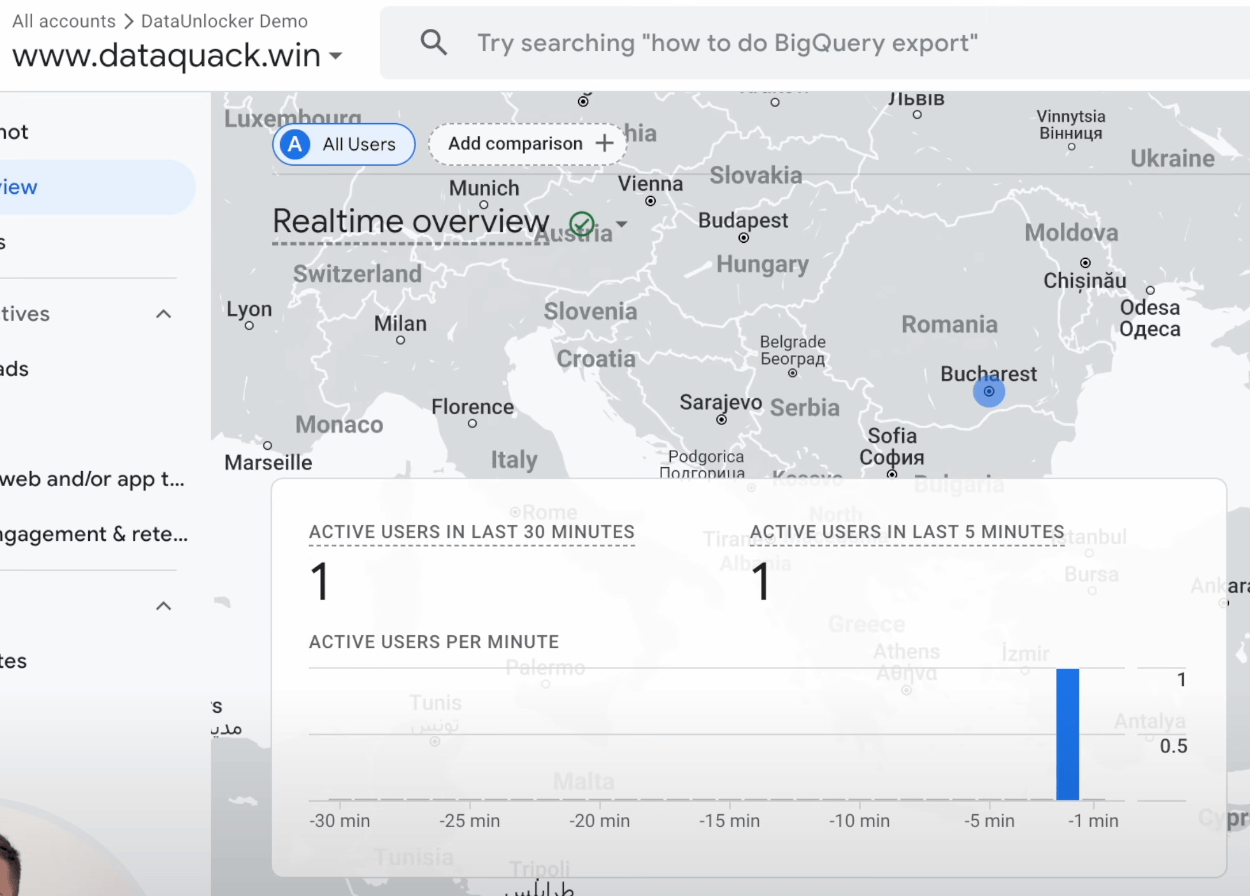
- Google Analytics: open the Realtime report in GA. You should see your visit, even with an ad blocker running. In our test, we could see two separate sessions from a desktop with an ad blocker and a mobile phone using a privacy browser.
- Meta Pixel & HotJar: these events should also appear in their respective dashboards. Note that there is a delay of 5-20 minutes for them to show up, which is normal.
Frequently Asked Questions
Q: I still see a blocked request in my network tab. Is something broken?
A: No. If you use "On demand" protection, Defender will intentionally try to fetch a commonly blocked URL to test if an ad blocker is active. This blocked request is how Defender knows to activate the proxy for your real tracking events.
Q: What if ad blockers just block my new transport endpoint URL?
A: This is where DataUnlocker's core protection shines. If a blocker manages to block a critical part of the DataUnlocker integration, it will trigger a Limited Mode. The interactive parts of your application will stop working correctly, effectively giving the blocker a choice: allow the app to function properly (with tracking) or break it entirely. Since the goal of blockers is to remove tracking without breaking sites, this ensures your protection remains robust.
For other FAQ, visit dataunlocker.com and see FAQ section.
Wrap Up
That's it! By following these steps, you've moved from having unreliable, incomplete analytics to a setup that provides 100% accurate data you can trust.
This blocker protection works seamlessly across the most popular analytics and tracking platforms, including but not limited to:
-
Baidu Tongji (百度统计)
-
CNZZ (U-Web 网站统计)
-
AT Internet (Piano)
-
...and others: DataUnlocker is a universal helper for all your marketing tools that are typically blocked by blockers, solving blocking in general.
Whether you're using client-side tools, server-side tag managers, or hybrid solutions, DataUnlocker ensures your tracking data gets through — undisturbed by ad blockers or privacy tools. Your analytics dashboards will finally reflect the full picture of your audience.
DataUnlocker is constantly evolving, so be sure to check for the latest features and integrations. If you have ideas or need help, reach out to our support or community channels.
Check more at dataunlocker.com and feel free to reach out.
Thanks for reading!
Your frontend's guardian,
DataUnlocker